
Azure AD preview module is needed for newer advanced features and powershell commands, including Teams related features.
Here are few things to keep in mind while installing this module:
- Make sure your current powershell executable is version 3.0 or higher.
- You will need to install PowerShellGet – you will be prompted when you install the AzureADPreview module.
- The operating system must be supported. See here – https://docs.microsoft.com/en-us/powershell/azure/active-directory/install-adv2?view=azureadps-2.0
- Run as administrator prior to opening the powershell window.
- This is most important – make sure you do not have AzureAD module installed, if you do, then uninstall the AzureAD module.
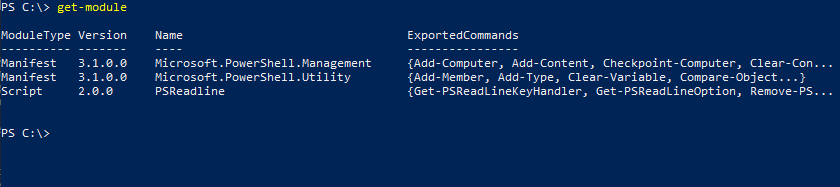
Run a get-module to check if you already have PowershellGet installed. If you do not have it installed the output will look like this –
You can now install the AzureADPreview module. It will first prompt you to install PowerShellGet – select Yes to this prompt.

You can install PowershellGet using the command in the screenshot.
C:\>Install-PackageProvider -Name NuGet -MinimumVersion 2.8.5.201 -Force
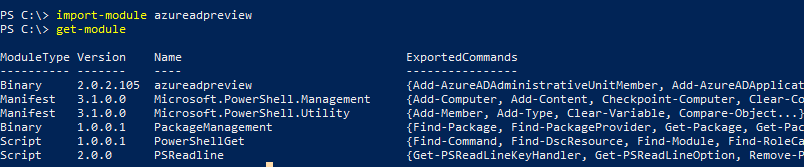
When you run the get-Module you will not see AzureADprovider.

You have to do a import module to load the module.
After AzureADPreview build is loaded you can use the following commands to connect to the module.
$AzureAdCred = Get-Credential
Connect-AzureAD -Credential $AzureAdCred